

Setup
This guide walks you through connecting Qezaro Orbit to your customers’ Microsoft environments. The process takes about 10–15 minutes and consists of five steps.
| # | Step | What you’ll do |
|---|---|---|
| 1 | Add Entra App | Register or use a Qezaro-created Microsoft Entra App |
| 2 | Add Customers | Add customer tenants individually, in bulk, or via fetch |
| 3 | Authorize App | Authorize the Entra App in each customer’s BC Admin Center |
| 4 | Grant Consent | Grant admin consent per customer (or ask them to) |
| 5 | Run Sync | Trigger a sync to start populating data |
Before you begin
Section titled “Before you begin”Make sure you have:
- Access to the Microsoft Entra admin center (required only if using your own Entra App)
- Your customers’ Tenant IDs
- A Dynamics 365 Administrator or Cloud Application Administrator role in each customer’s tenant (for the authorization step)
The two permission steps require different roles in the customer’s tenant:
| Step | Required role |
|---|---|
| Step 3 — Authorize the Entra App | Dynamics 365 Administrator or Cloud Application Administrator |
| Step 4 — Grant admin consent | Global Administrator or Cloud Application Administrator (or a DAP relationship) — Dynamics 365 Administrator is not sufficient |
Step 1 — Add an Entra App
Section titled “Step 1 — Add an Entra App”Orbit uses a Microsoft Entra App to make API calls to your customers’ tenants. You have two options — pick the one that fits your setup:
Option A — Use your own Entra App
Section titled “Option A — Use your own Entra App”1. Register the app in Microsoft Entra
Section titled “1. Register the app in Microsoft Entra”- Go to https://entra.microsoft.com/ and sign in.
- Navigate to App registrations and create a new app.
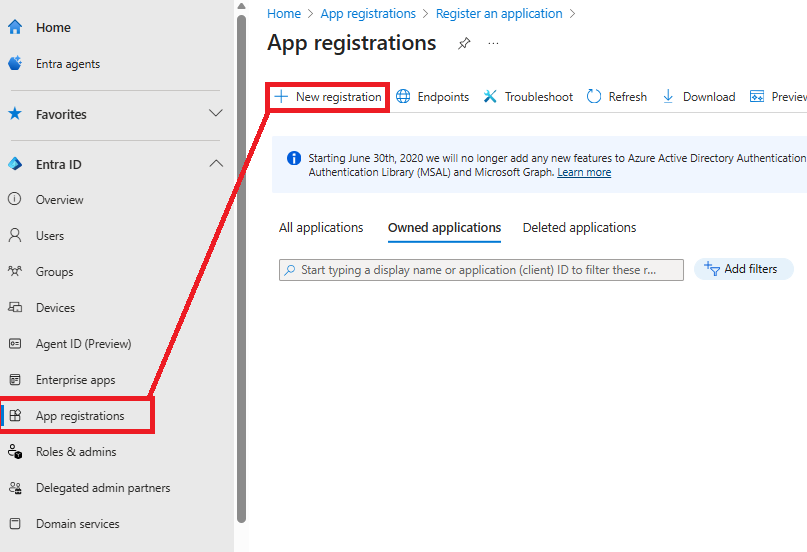
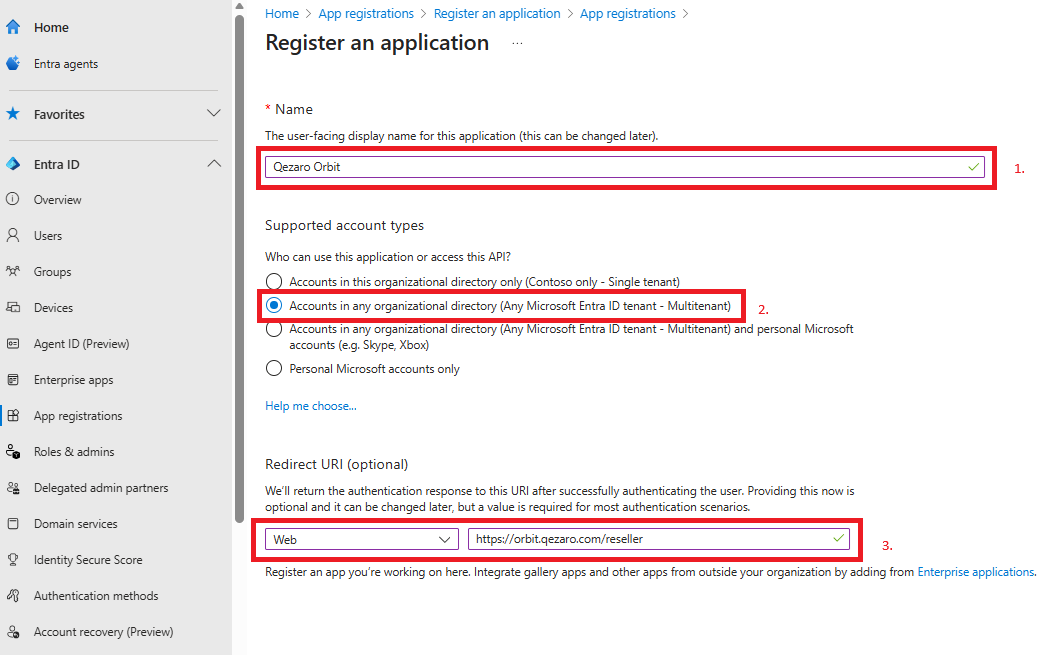
- Fill in the registration form:
- Name — give your app a recognizable name
- Supported account types — select “Accounts in any organizational directory (Any Microsoft Entra ID tenant - Multitenant)”
- Redirect URI — select Web from the dropdown and enter:
https://orbit.qezaro.com/reseller
2. Create a client secret
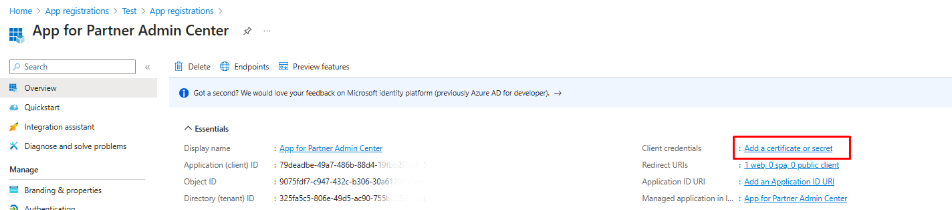
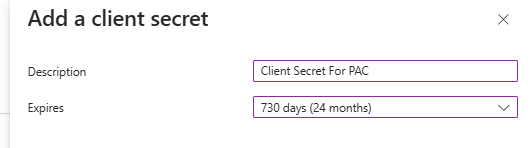
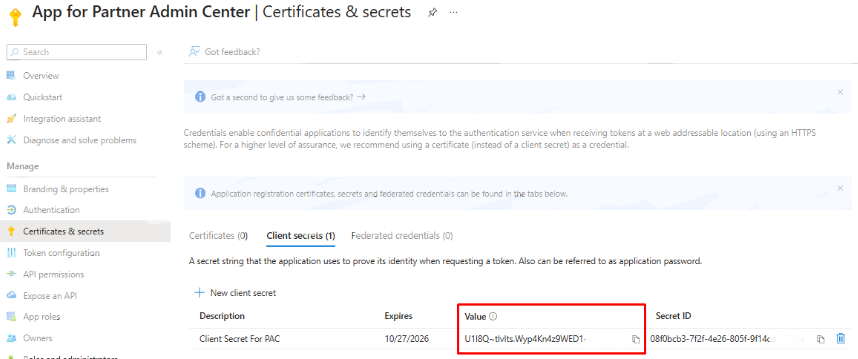
Section titled “2. Create a client secret”After registering the app, go to Certificates & secrets and create a new client secret.
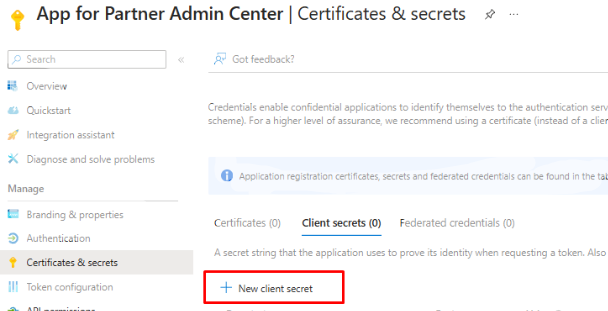
Give it a name and set an expiration date.
3. Grant API permissions
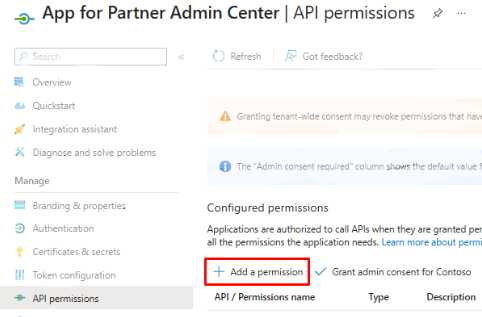
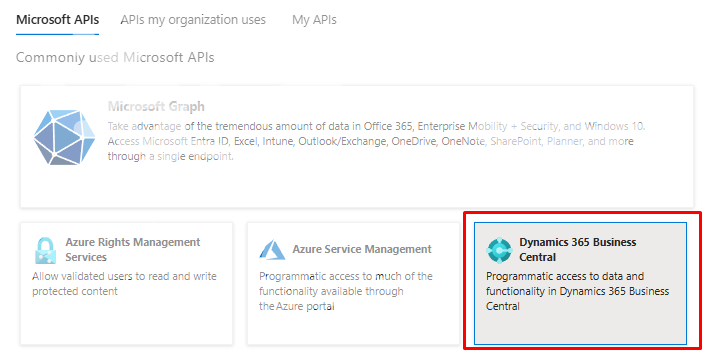
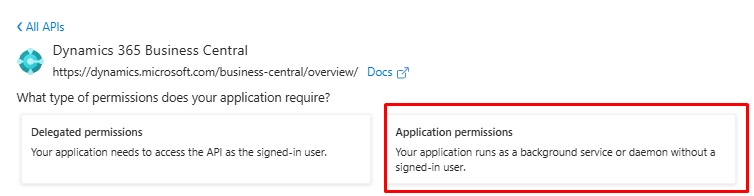
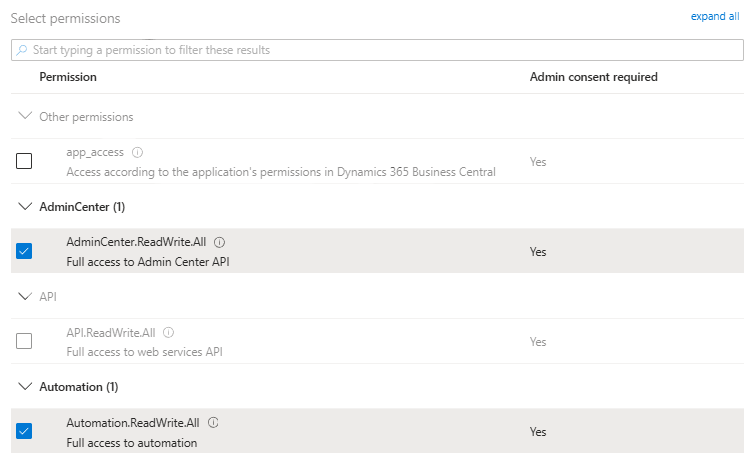
Section titled “3. Grant API permissions”Next, grant the app the permissions it needs to make API calls to the Business Central Admin Center.
4. Add the app to Orbit
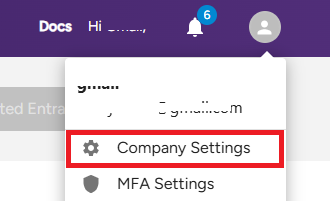
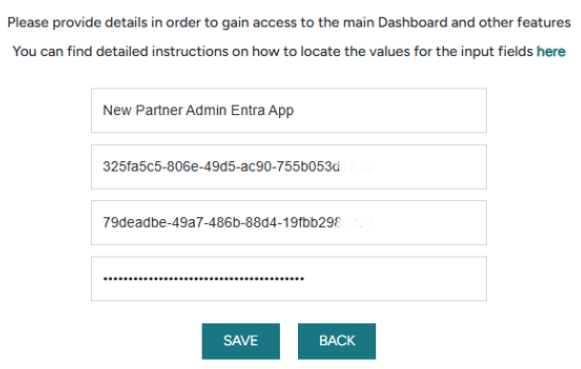
Section titled “4. Add the app to Orbit”Once the app is set up in Entra, go to Company Settings in Orbit and enter the values you just created.
Copy the values directly from the Microsoft Entra admin center — Application (client) ID, Directory (tenant) ID, and the client secret value.
Option B — Use Qezaro’s app
Section titled “Option B — Use Qezaro’s app”This is the fastest option. Orbit will create a unique Microsoft Entra app under its own tenant on your behalf.
In Orbit, go to Company Settings and click “Use Qezaro Created”.
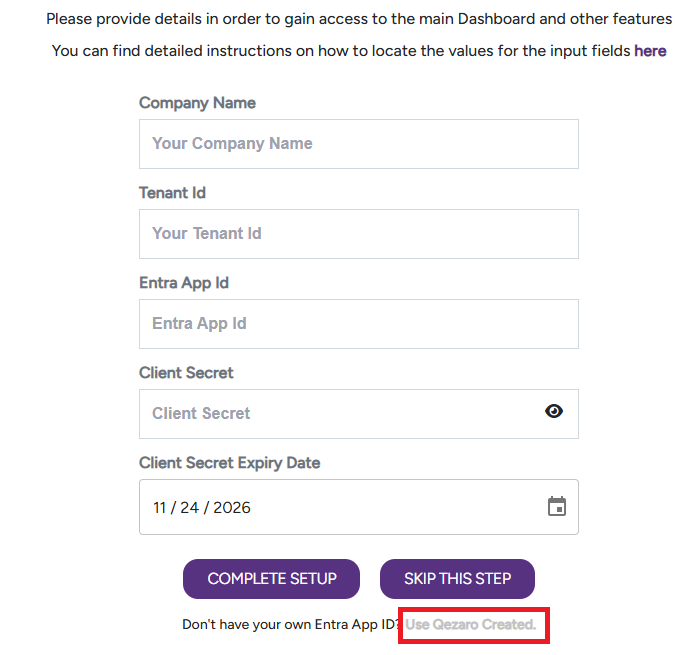
That’s it — no additional configuration needed. Continue to Step 2.
Step 2 — Add customers
Section titled “Step 2 — Add customers”Add the customers whose environments Orbit will manage. You have three ways to do this:
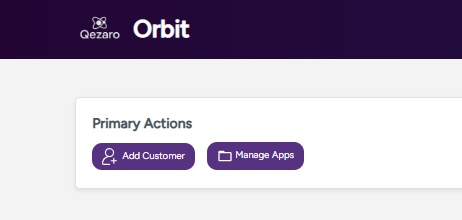
Add a single customer
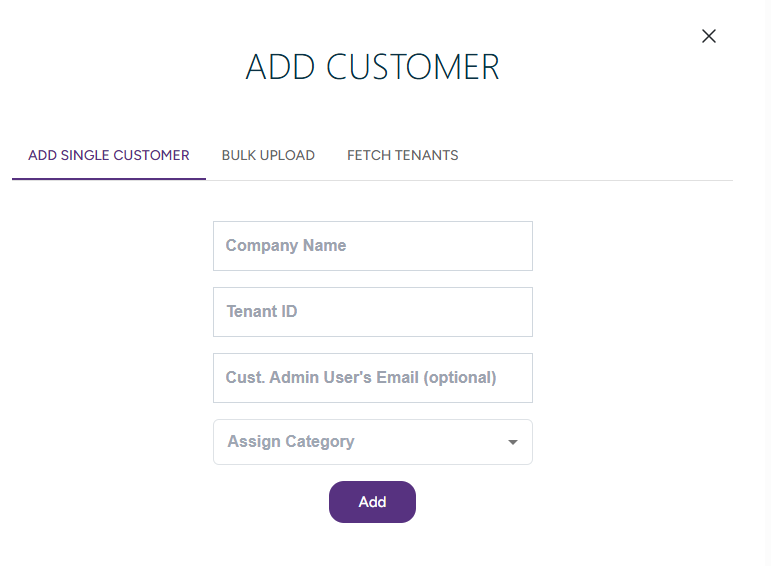
Section titled “Add a single customer”Click Add Customer → Add Single Customer and fill in the form:
| Field | Description |
|---|---|
| Company name | A label to help you identify the customer |
| Tenant ID | The customer’s Microsoft Entra Tenant ID |
| Cust. Admin User’s Email | (Optional) The customer admin’s email — used later to request permissions via the built-in email feature |
| Assign Category | (Optional) The customer’s category |
Bulk-add customers via Excel
Section titled “Bulk-add customers via Excel”Best for onboarding many customers at once.
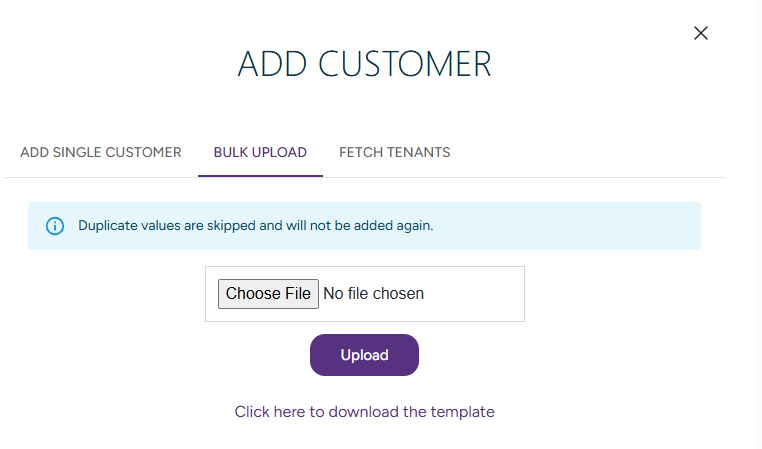
- Click Add Customer → Bulk Upload.
- Download the Excel template and fill in the columns:
| Column | Description |
|---|---|
| companyname | Customer’s company name |
| TenantId | Customer’s Tenant ID |
| AdminEmail | (Optional) Customer admin’s email address |
| CategoryName | One or more categories, separated by semicolons (;) |
- Upload the completed file. Refresh the page to see the new customers appear.
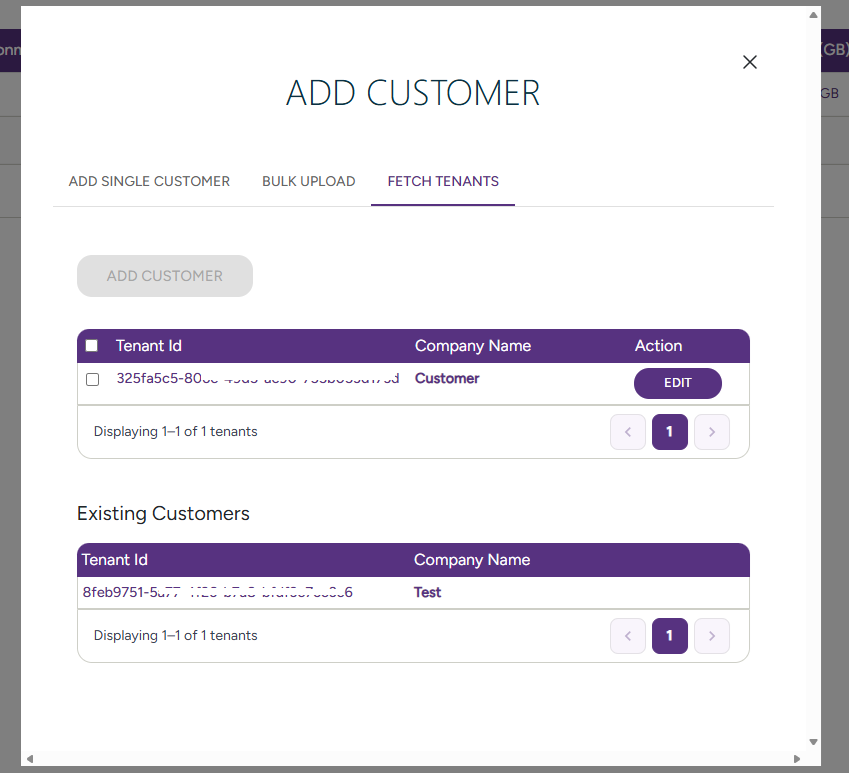
Fetch customers from your Entra App
Section titled “Fetch customers from your Entra App”Use this if you’ve already granted admin consent and want to avoid entering Tenant IDs manually.
Click the Fetch Tenants button — Orbit will retrieve a list of customers your Entra App is authorized to manage. Select the right tenant, give the customer a name, and add them.
Step 3 — Authorize the Entra App
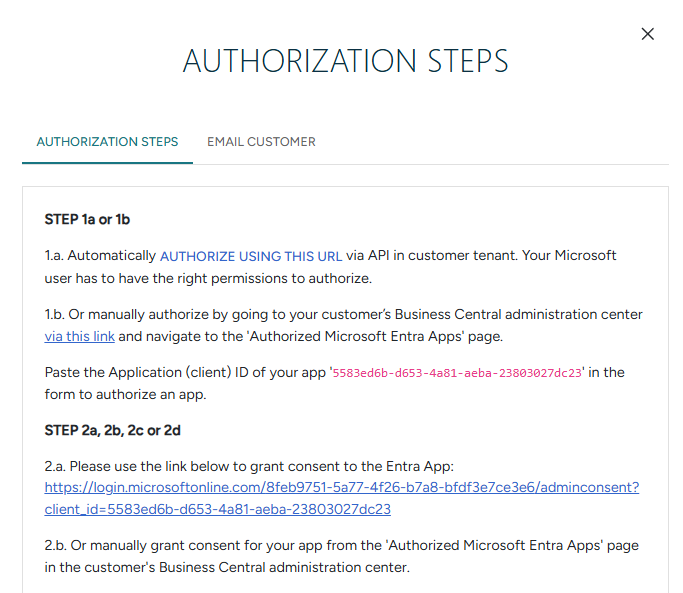
Section titled “Step 3 — Authorize the Entra App”Each customer must authorize the Entra App before Orbit can access their data.
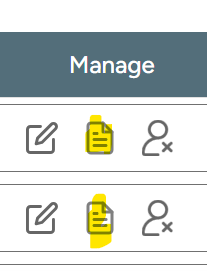
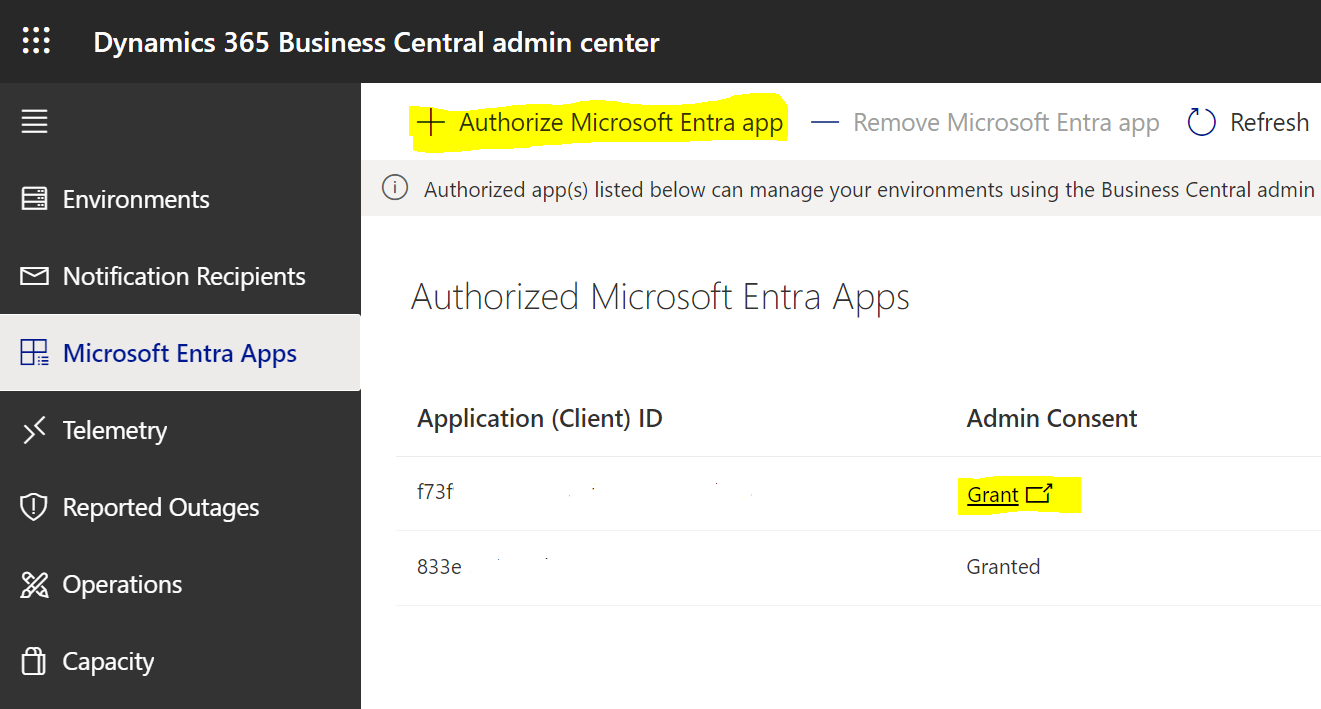
Go to the Authorization Steps page in Orbit. The page shows the App ID and step-by-step instructions for authorizing in each customer’s Business Central Admin Center.
Step 4 — Grant Admin Consent
Section titled “Step 4 — Grant Admin Consent”The last permission step: granting admin consent for each customer. You’ll do this per customer.
If you have access (DAP relationship, or Global Admin / Cloud Application Administrator role in the customer’s tenant): Grant consent directly from the Authorized Microsoft Entra Apps page in the BC Admin Center.
If you don’t have access: Share the URL from the customer’s Authorization Steps page and ask their administrator to grant consent.
Step 5 — Run Global Sync
Section titled “Step 5 — Run Global Sync”You’re almost done! The final step is to trigger a sync to start pulling data into Orbit.
- Global Sync — syncs all customers at once
- Individual Sync — syncs a specific customer
Once the sync completes, refresh your browser to see the data populate.